

- November 17, 2026
- by Almifthaah
How to Prevent Brass Shims From Slipping Between Machine Components
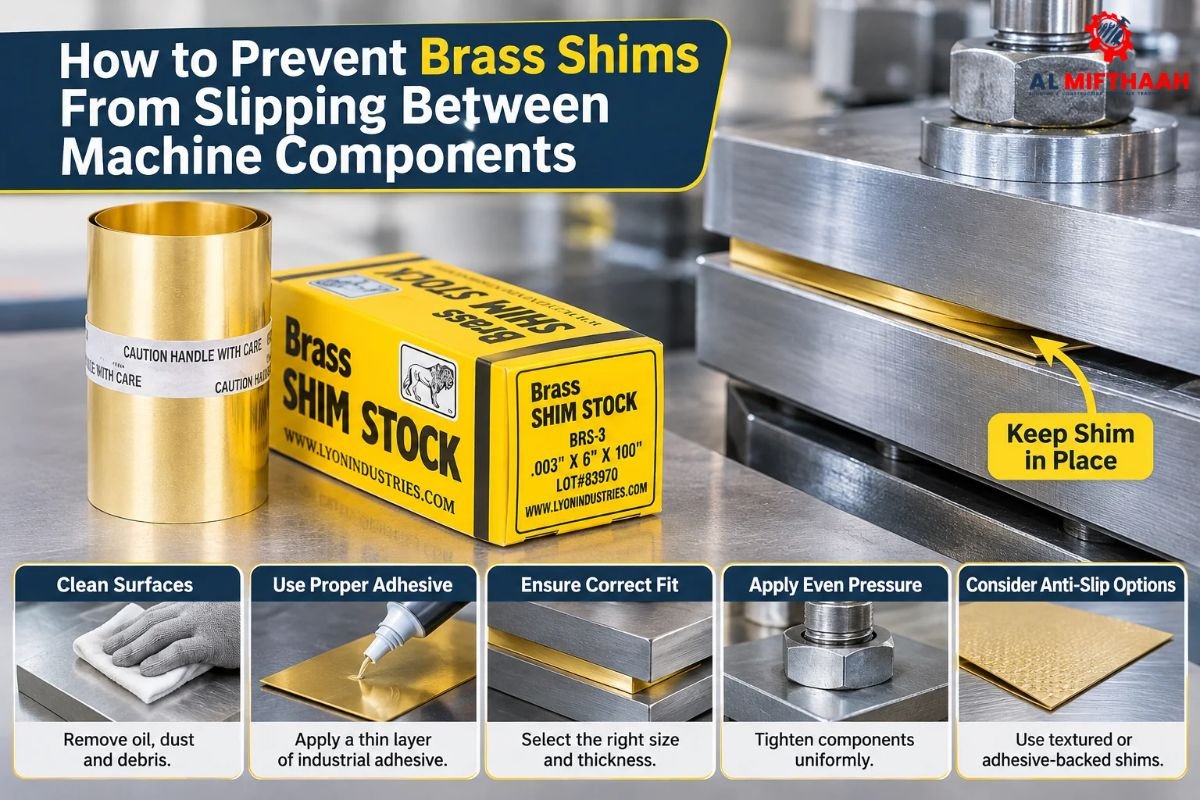
Brass shims can slip in certain situations for several reasons: either the surfaces are dirty or irregular, or the shims are too loose and the vibrations acting on the joint result in gradual damage to it. Thankfully, slippage in most situations can be avoided. The surfaces must be cleaned and smoothed out, the thickness and the level of flatness of the materials must be appropriate, the stack must be as low as possible, and the pack must be secured using dowels, tabs, or an adhesive. The pack should be assessed after the initial working cycle since noticeable movement can be observed very early on.
This blog explains why slippage happens and how to prevent it from occurring. It is intended for maintenance engineers and supervisors in mechanical engineering shops and for professional purchasers of shims in the UAE.
Table of Contents
ToggleKey takeaways
- Clean up, deburr, and inspect both mating surfaces prior to installation of a shim.
- Dowels, tabs, or notches are used for mechanical retention; adhesives should be reserved for joints that cannot be drilled.
- Keep stacks at a minimum size and measure their thickness using calibrators.
- Check torque and shim position again after each operation cycle and according to an established maintenance plan.
What causes brass shims to slip out of position?
Brass shims typically slip due to the lack of friction or geometry between the joints being held. These are typically caused by oily or dirty faces, burrs that lift the stack, inadequate or unequal clamping force, repeated vibration, and thermal cycling. There is a specific solution for each cause, and if the cause is not diagnosed before the shim is changed, then it wastes time and money.
Most of the time, this issue is spotted when a shim pack moves when a shift is made, and maintenance teams start searching for shim stock suppliers in Dubai to replace the shim pack. Typically, the supplier is not the actual cause. Brass is an easy-to-work-with material because of its softness and relative ductility. If a joint around a thin stack is not controlled, the joint will deform, shift, or flatten when a load is placed on it. The mechanic knows how it works, and the right fix becomes much easier to decide on.
Here are the most frequent contributors:
- Contamination and lubricants: Oil, grease, cutting fluid, and metal dust lessen the friction between the shim and its mating surface. Even a small side load can then push the pack out of position.
- Raised edges: A raised edge may cause one side of the stack to rise up and cause the shim to push outwards during operation.
- Vibration and cyclic loading: Micro-movement over time, over days or weeks, often much longer than minutes, causes a shim to gradually lose its place.
- Improper or incomplete clamping: If the bolts are not tightened properly or in the correct order, one side of the joint is overburdened, and the pack may slide or rotate.
- Thermal expansion: Dissimilar materials expand at different rates when heated. This may loosen the grip on a thin pack and permit freedom of movement when the machine is operating at its operating temperature.
The table below links each cause to a typical sign and a practical fix.
| Cause | Typical Sign | Practical Fix |
| Oil or dust on faces | Shim moves easily by hand | Degrease and dry both surfaces before assembly |
| Burrs or raised edges | Shim sits at an angle | Deburr edges with a fine stone or file |
| Vibration | Gradual shift during operation | Add locating dowels or use a bonded pack |
| Uneven bolt clamping | One side gaps or shifts | Tighten in a cross pattern to specified torque |
| Thermal cycling | Movement appears after warm-up | Review material pairing and joint clearance |
Vibration and Repeated Loading
Vibration is the number one underrated cause of shim slippage. A rigid, non-moving joint in a static inspection may move during a running machine due to repetitive forces. A shim can move by 1/1000mm during each operating cycle, and these movements add up. That’s why many shim failures are not on day one but weeks after commissioning. Early detection occurs when the joint is examined after the first operating cycle, and again after the first week. Only if it is observed when put to the test will it be considered a fault and not movement.
Smooth or Contaminated Surfaces
The condition of the surface is just as important as the shim. Even if the surface appears perfect after it has been brightened and well-machined, a small amount of cutting fluid may remain that will allow the shim to slip under load when it should not. A rough, under-prepared surface may appear to offer a more stable grip, but can also chip or scratch a soft brass shim and lead to non-uniform contact points, which will cause hot spots.
The aim is not just to have rough surfaces, but a clean, flat and consistent surface. Simply wiping with a lint-free cloth is not usually sufficient. Clean with approved degreaser, allow surfaces to dry thoroughly, and check surfaces in good light before assembling.
How do you choose the right brass shim stock?
Select brass shim stock that has the same thickness tolerance, flatness, temper, and outline as the joint. Even the best machine assembly will not produce a stock that is out of tolerance or warped. Request the specified tolerance and material grade from suppliers; ensure that there are no surface defects or burrs observed before cutting or stacking a sheet.
Many slippage issues start in procurement. Teams should request documented thickness tolerance and a clear material specification from the Lyon shim stock supplier in Dubai. A supplier that can discuss the temper and edge condition of a sheet, as well as the flatness, will have a better understanding of the best way to help a precision application than a supplier who simply quotes the price for a sheet. Even if using a trusted supplier, incoming inspection is still necessary, as a single bad batch can lead to recurrent failures in multiple machines.
Almifthaah, also known as a Saif Precision tools supplier in UAE, can also consult with buyers on the operating conditions prior to ordering to ensure the stock complies with the duty. It is about the application, not the catalogue – that’s the key to good supplier conversations. These are the points to consider before ordering:
- Tighter tolerances: Fewer shims will be needed, and each shim will be more stable when loaded.
- Flatness: A bowed or waved sheet will leave small spaces, which will aid in vibration and movement.
- Hardness and temper: A harder temper will not deform during clamping, with the result that the shim will maintain its shape over time.
- Shape and tab design: A shape that corresponds to the component and its locating will be much easier to attach to than a generic cut.
- Edge quality: Clean and burr-free edges to prevent lifting and wedge effects at the beginning of the stack.
Thickness and Tolerance Control
Fewer, thicker shims are almost always superior to a large number of thin shims. Each interface within a stack could be a slip point, and each introduces its own variation in surface friction and flatness. If possible, choose the closest standard thickness that will fill the gap that is required, and then use a single layer to fine-tune the thickness as needed. This decreases the number of contact faces, simplifies inspection, and minimizes the risk that one thin layer will walk out of position. If a stack needs to be multi-layered, note the orientation and sequence of each layer in the stack so that it can be reconstructed accurately during maintenance.
Outline, Size, and Edge Condition
A shim should have no play, but should not be forced into its location. If the shim is oversized, it will bind, and if it is undersized, it will wander under vibration. Particular attention should be paid to edges. After cutting, deburr all the edges and ensure that corner radii align with locating features on the component. A corner that seems to be sharp enough to pass inspection can still embed on a mating edge and cause the stack to tip. To avoid that issue, inexpensive fine-grit stones, deburring tools, and a magnifier are helpful.
How can you hold shims in place mechanically?
Mechanical Retention is the method in which the movement of a shim is prevented by utilizing mechanical features such as dowel pins, locating tabs, notches, or bolts through. These methods can be used even if there is limited contamination or vibration, making it the most reliable method for critical joints. When mechanical retention is possible, use that rather than adhesive retention.
Dowel Pins and Locating Features
The easiest and most reliable method of resisting lateral movement is to use dowel pins. Drill holes in the shim and the mating part that match and put the pins into with a snug fit. Clean the holes and ensure that the shim is completely in place before inserting the pin. If a shim is pushed onto a pin at an angle, then it’s likely it will deform or crack and therefore fail to retain as desired. The pin diameter and position must be determined by the joint loading, and the pins are to be inspected at routine maintenance for wear or looseness at that time.
Tabs, Notches, and Keyed Designs
If it is not feasible to drill, try a tabbed or notched outline that catches a corresponding feature on the part. Keyed designs are particularly useful when used with repeat assemblies where it is not possible to put the shim in the wrong position. They also accelerate removal and reinstallation, for the position is not set by memory, marks, or the experience of an expert technologist but by the geometry. This one change alone can save a lot of recurring failures for machines serviced by rotating teams.
The table below compares the main retention options
| Retention Method | Best Use | Main Limitation |
| Dowel pins | Critical joints with lateral loads | Requires drilling and precise alignment |
| Locating tabs or notches | Repeat assembly and quick replacement | Needs suitable features on the component |
| Bolt-through shims | Heavy-duty joints | Bolt holes can weaken thin shims |
| Bonded packs | Joints where drilling is not possible | Limits disassembly and can be affected by heat |
When should you use adhesive or threadlocker?
If a shim pack is to be permanently joined as a single pack (or if mechanical retention is not possible), use adhesive or a thread locker. Use a product that has been rated for the temperatures and metals being used; apply a thin, even coat and let it cure completely before loading. Less is more: If the adhesive layer is too thick or uneven, it can also be the “slip point.
The choice of adhesive should be based on the actual working environment of the machine. The same pack that bonds for a cool workshop bench may not bond on a machine that operates for long periods at high temperatures or where coolant mist is present.
For those using Saif Precision tools supplier in UAE, the engineers can explain the load, temperature range, and the disassembly requirements and verify the selected adhesive with the manufacturer’s technical data sheet. It is a good idea to test a sample joint under near-real conditions before going into production.
A practical bonding sequence looks like this:
- Use a solvent that will not leave a grease film on both sides and wipe in only one direction.
- Ensure that the surfaces are completely dry and check for burrs when illuminated by good light.
- Spread a thin and even coat of the approved adhesive on one side.
- Pack and press gently with even pressure as the adhesive starts to set.
- Do not run the machine or final torque the machine until cured.
However, the purpose of thread lockers is different. They can be used with bolt-through shims, which require the bolt to be anti-loosening. Put a small amount on the threads, not on the shim faces, and cure the product according to its recommended cure time. Shim packs can have surfaces on them that are glued with glue that can be unpredictable and shift while under load. Store the locker in the locker, and use mechanical retention for the shim.
How do assembly practices prevent shim movement?
Most slippage can be prevented by good assembly practice. Clean all surfaces, press all shims into place, tighten all fasteners in a cross pattern to the torque specification, and check alignment before the joint is closed. Record all of the steps so that the assembly can be duplicated during future maintenance.
Right tooling is also crucial at assembly. Precision instruments suppliers in Dubai can help teams to check each layer of the work before the close joint, and this way undercuts problems from the initial stage. If precision instruments suppliers provide micrometers, dial indicators, and feeler gauges, then teams can verify each layer before closing the joint; therefore, the problem is avoided from the beginning.
Keep inspection tools in good condition so they give accurate results, and store them in clean, dry places. The micrometer that drops once can look perfect but read incorrect, which error will be passed through to and in the shim stack.
Common assembly mistakes are easy to avoid once they are recognised:
- Installing shims one by one and not using the drawing to verify correct positioning.
- Tightening one bolt completely before starting the other bolts, causing the joint to come out of square.
- Using a shim that has been compressed or bent to fit an earlier assembly.
- Not cleaning due to visual cleanliness.
- Failing to record which shim went where, which makes the next maintenance visit slower and more error-prone.
Torque and Clamping Sequence
The torque is important, as it produces the clamping force which holds the pack together. A shim is not thick enough if there is too little torque, and it is too thin if there is too much torque. Use a calibrated torque wrench and conform to the component’s specification. If the manufacturer specifies a sequence of tightening, use it. It is generally better to use a sequence of stages, starting the fasteners by hand and then tightening each one to full torque, when compared to tightening each one to full torque in order.
How should you measure and verify shim thickness?
Use a calibrated micrometer to measure the thickness of each shim at several places around the surface, and report the mean thickness and the range. The thickness of the shim is critical even if it is the correct average thickness if the thickness change is significant across the face. Verification should be done before the installation and at the end of the first operation cycle to ensure there is no movement of the joint.
The first step in good measurement practice is the appropriate instrument of measurement. For calibration-grade gauges and inspection tools, many workshops obtain their tools from machine measuring tools dealers in Dubai, in order to ensure that the micrometers, height gauges, and dial gauges are traceable and suitable for the tolerances they need to measure. It saves time later if the shim is inaccurate, as it will cause problems in the machine.
Measuring Tools for Shim Work
A micrometer that has a resolution relevant to the tolerances is typically preferred for shim thickness. Dial indicators are more appropriate for checking the flatness of the surface, while for gauging the size of the gap, feeler gauges are used after the stack is assembled. When companies rely on precision instrument suppliers in Dubai for checking, it is important to use the right instrument depending on the tolerances to be controlled.
Furthermore, an instrument that has a resolution of one-hundredth would not be worthwhile where the tolerances are greater than this. It is also better to use the same instrument, the same reference, and the same operator for the repetition, as the variation between instruments and people might be greater than the tolerances.
Recording and Tracking Shim Packs
Record the thickness, positioning, and installation date of each shim. Using a basic log allows technicians to reassemble shim packs properly without guesswork when maintenance takes place. It may also show important patterns: for example, if a certain joint tends to shift every several months, that fact will be recorded in the log, showing that the issue may be related to deeper design or load problems instead of referring to one faulty part. Using a shared digital record or even a laminated card that is stored in the machine may make a big difference.
What maintenance routine keeps shims stable over time?
A stable shim joint has to be subjected to periodic inspections, cleaning, torque checks, and replacement of deflected shims. Inspect the joint after the first operational cycle, and then at intervals that depend on the machine usage. Fix any shim that shows deformation, scratching, or discoloration, as those symptoms are indicative of excess loading or contamination.
A practical routine is more effective if it is documented in the maintenance schedule rather than remembered. Ensure that visual inspections for trace marks, torque tests for joint fittings, and the thickness check of any removed shim are included. If stock needs to be replaced, a supplier of Lyon shim stock in Dubai can provide an exact replacement, while dealers of industrial equipment in Dubai supply the equipment needed to confirm the matching of the new part. Keeping the replacement specification on record will help to avoid the ordinary mistake of using one shim instead of other varieties at hand that look the same but have different temper or tolerances.
When performing every scheduled service, take into account using the following checks:
- Inspect the joint for signs of shifting, fretting, or color changes every time the service is done.
- Retighten the fasteners according to the specifications during the first few working hours and regularly afterwards.
- Eliminate any impurities from the surfaces each time disassembly occurs and make sure there are no foreign bodies or metal elements there.
- Have spare shims kept in labeled packages so that they are similar in thickness and shape to the originals.
Final verdict
Slippage prevention of brass shim is not always due to a single flawless item. This is done by good procurement, clean preparation, sound retention design, and disciplined maintenance. Reliable Shim Stock suppliers in Dubai provide you with consistent materials; however, the outcome depends on installation, measurement, and testing procedures. To get information about shim stock, precision instruments, and machinery parts, contact us at Almifthaah for more details before your next assembly.
Frequently asked questions
Tightening is not enough to prevent slips. Clean the face off, deburr the edge, and attach a dowel or tabs before retightening it.
Select dowel pins for drilling because they prevent movement mechanically. Adhesive should be used for drilling purposes only if it cannot be done otherwise.
After initial cycles, inspect new joints at intervals as required by their duties. More often to check high vibration equipment.
Use shims only when they remain flat, unbroken, and within tolerance limits. Avoid distortion, scoring, or compression of edges.

How to Identify the Correct Gear Cutter When the Markings Are Missing

Carbide Tool Maintenance Tips Every Machinist Should Know